
Every subscription email has a subject and a short intro message you can write yourself. The rest of the email, the order summary, the customer information and the button back to the account, is built by the app so the numbers are always right.
Step 1: Open the email
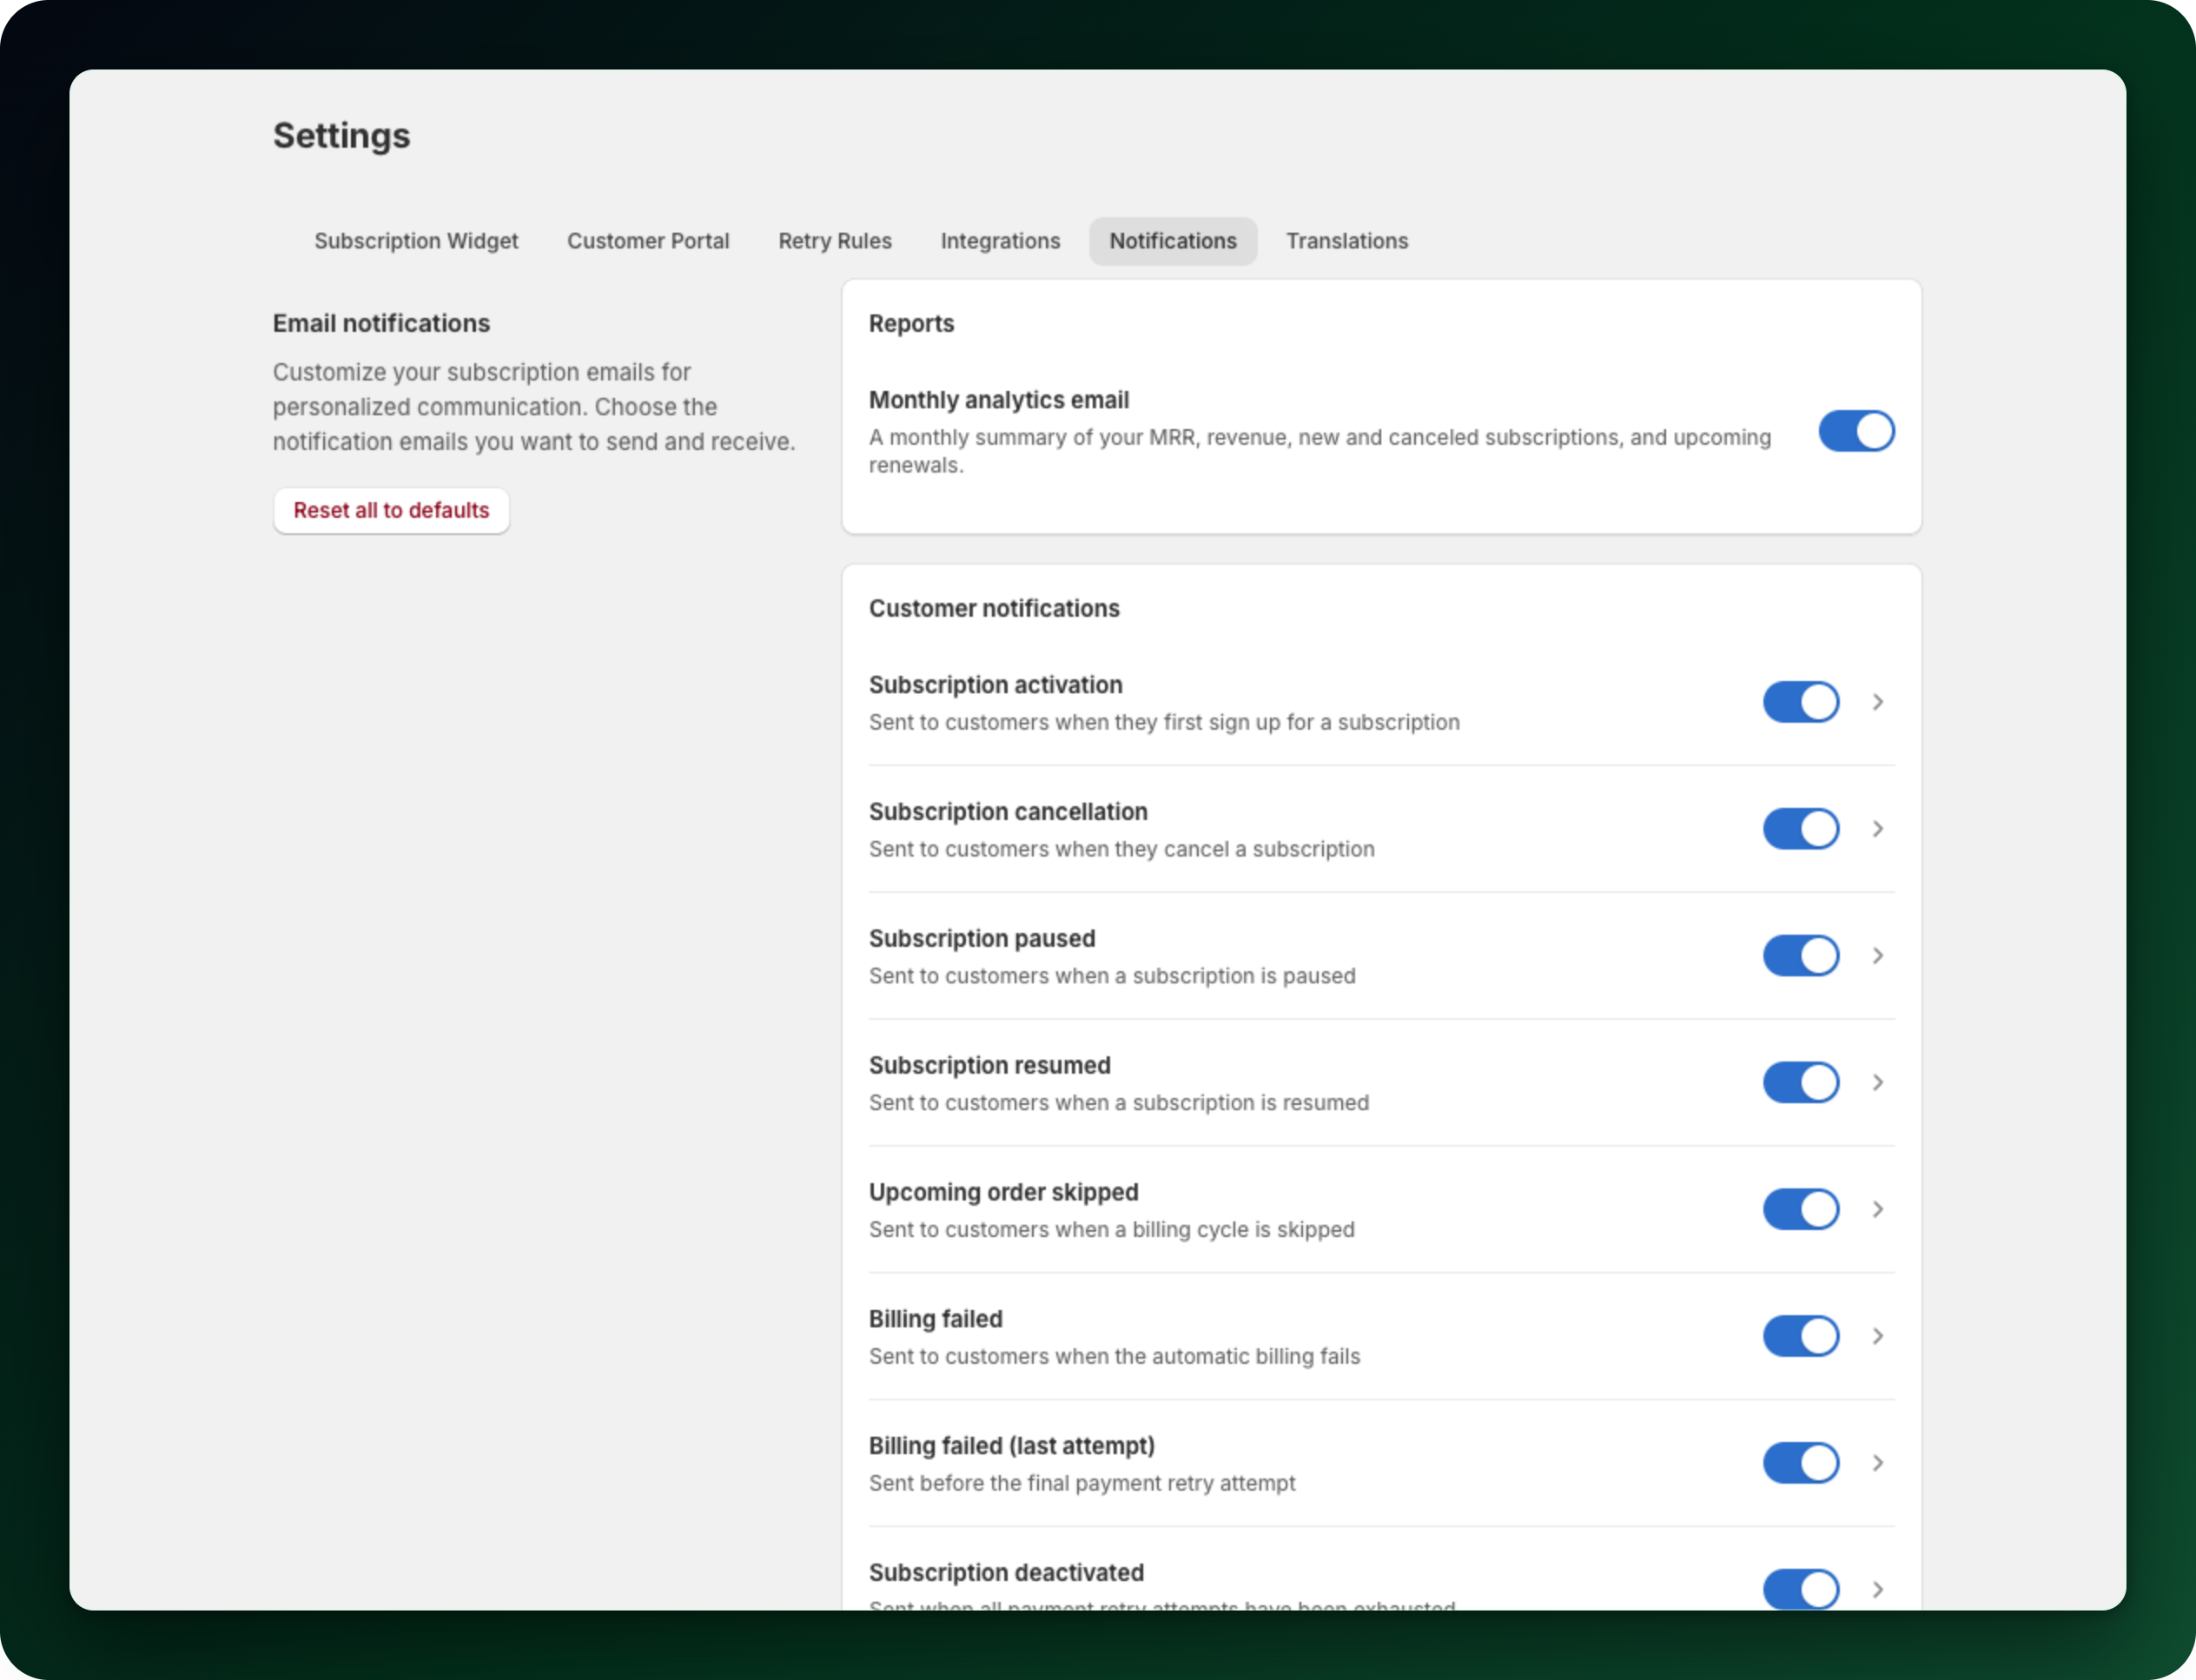
Go to Settings → Notifications and click the row you want to change, for example Subscription paused. The switch on the row turns the email on or off; clicking anywhere else opens the editor.
Step 2: Write the subject
The From address is fixed and cannot be edited. The Subject can be up to 160 characters and may contain variables, for example "Your subscription to {{subscription_title}} is paused".
Step 3: Write the intro message
Under Content, the Intro message is the text that sits above the order details. It takes up to 400 characters of plain text. Links, domains, email addresses and HTML are rejected here and in the subject line, which keeps the emails clean and helps them reach the inbox.
Step 4: Use the variables
The Available variables card lists the placeholders that email supports. They differ per email, so copy them from that card. Most templates offer {{customer_name}}, {{shop_name}}, {{subscription_title}} and {{contract_id}}.
Step 5: Preview and test
The Preview panel on the right renders the whole email with sample data as you type. When it looks right, click Send test to receive it. The test always goes to your store email and arrives with a [TEST] prefix. Test sends are limited, so send a few at a time.
Step 6: Save
Click Save in the save bar after making a change. Restore default puts the original subject and intro back into the form, and you still have to save to keep them. To reset every email at once, use Reset all to defaults on the Notifications tab.
One version per store
Each store language has its own subject and intro. The editor's language selector lets you write a different version for each one, and customers get the version that matches their account language; anyone else gets the store's default language.
What to do next
Check which emails are actually sent, and what triggers each of them.
Turn off any email you would rather handle yourself, using the switch on its row.
Translate the widget labels and plan names, which do follow the customer language.
Stuck on any of this? Open the chat in the bottom right corner of the app and we will help you set it up.